
How to Install an eSIM on iPhone and Android
Step-by-step instructions for iPhone and Android, the three ways to install an eSIM, the settings to check afterwards and fixes for common errors.
Quick answer
- Check that your phone supports eSIM and is unlocked, and install on stable Wi-Fi.
- You can't scan a QR code shown on the same phone: use a second screen, manual entry or an install link.
- After installing, set the travel eSIM as your data line and turn on data roaming for that line only.
- Many eSIMs can only be installed once, so don't delete one to fix a problem.
Installing an eSIM takes a few minutes once you know where to look, but the menus are tucked away and a couple of small mistakes can cost you the plan you paid for. This guide walks through the whole process on iPhone and Android, explains the three ways an eSIM can be installed, and covers the settings to check afterwards so the new line actually works when you travel.
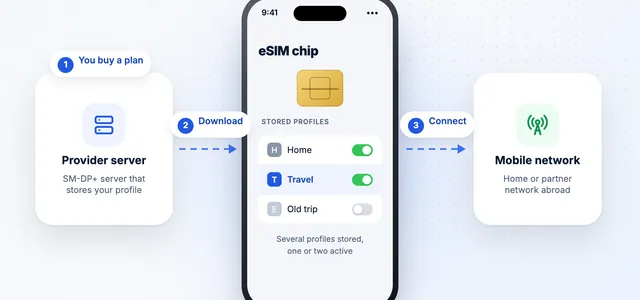
If you're new to eSIMs, it helps to know that you're not installing an app. You're downloading a small profile that tells your phone how to connect to a mobile network. Once it's on the phone, it appears as a second line in your settings, next to your regular SIM.
Before You Start: Four Quick Checks
A little preparation saves most of the problems people run into:
- Your phone supports eSIM and is unlocked. A phone locked to its carrier may refuse an eSIM from another provider, even if the hardware supports it. If you're not sure, ask your carrier before you buy a plan.
- You're on a stable internet connection. The eSIM downloads during installation, so connect to reliable Wi-Fi first.
- The install details are ready on another screen. Your phone's camera can't scan a QR code that's showing on its own screen, so open the code on a laptop, a tablet or a printout. If that isn't possible, use manual entry or an install link instead.
- You know when the plan starts. Some plans begin counting days when you install them, others when they first connect in your destination. If yours starts on installation, don't install it a week before you fly.
Install at home, not at the airport
Installing a day or two before departure, on your home Wi-Fi, gives you time to contact the provider if something goes wrong.
Three Ways to Install an eSIM
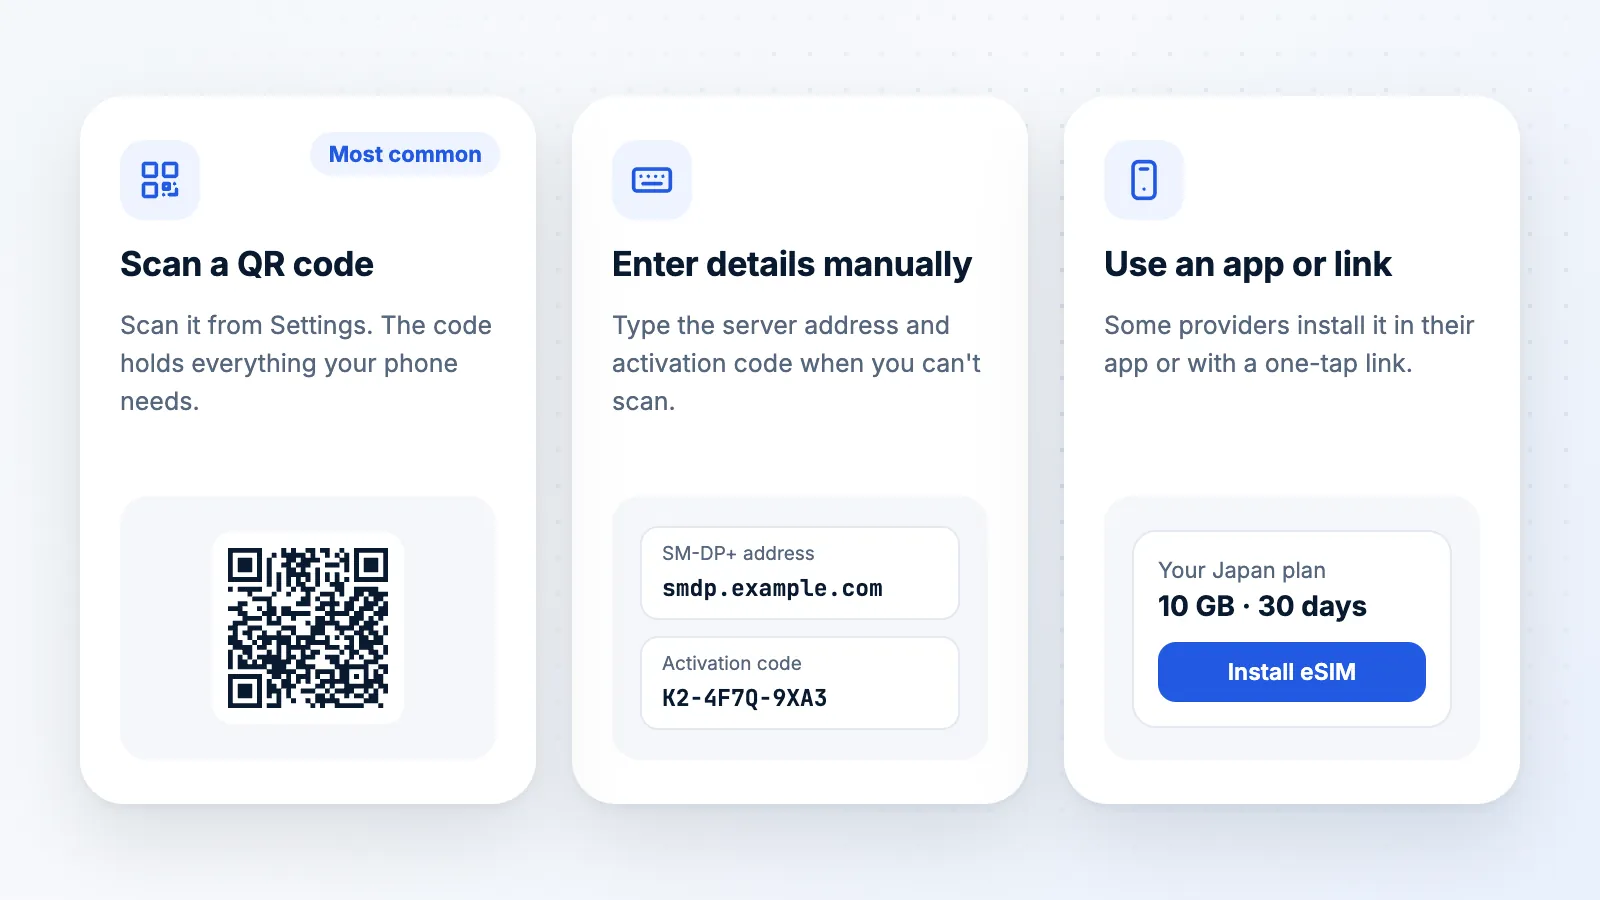
Scanning a QR code
This is the most common method. The provider emails you a QR code or shows it in your account, and your phone scans it from the eSIM settings. The code contains everything the phone needs to find and download your eSIM profile.
Entering the details manually
Underneath the QR code, most providers also list the details in text form: an SM-DP+ address (the provider's server) and an activation code. Some Android phones ask for the full code in one field instead, which usually starts with "LPA:1$". Manual entry is the fallback when you can't scan, for example when the QR code is on the same phone you're installing it on.
Installing from an app or a link
Some providers install the eSIM through their own app, so you never see a QR code at all. Recent versions of iOS also support install links: tap the link on your iPhone and it opens the eSIM setup in Settings directly. Your home carrier might use its own process too, such as converting your existing physical SIM to an eSIM in its app.
How to Install an eSIM on iPhone
Menu names vary slightly between iOS versions and regions. In some countries the menu is called Cellular, in others Mobile Service or Mobile Data.
- Connect to Wi-Fi.
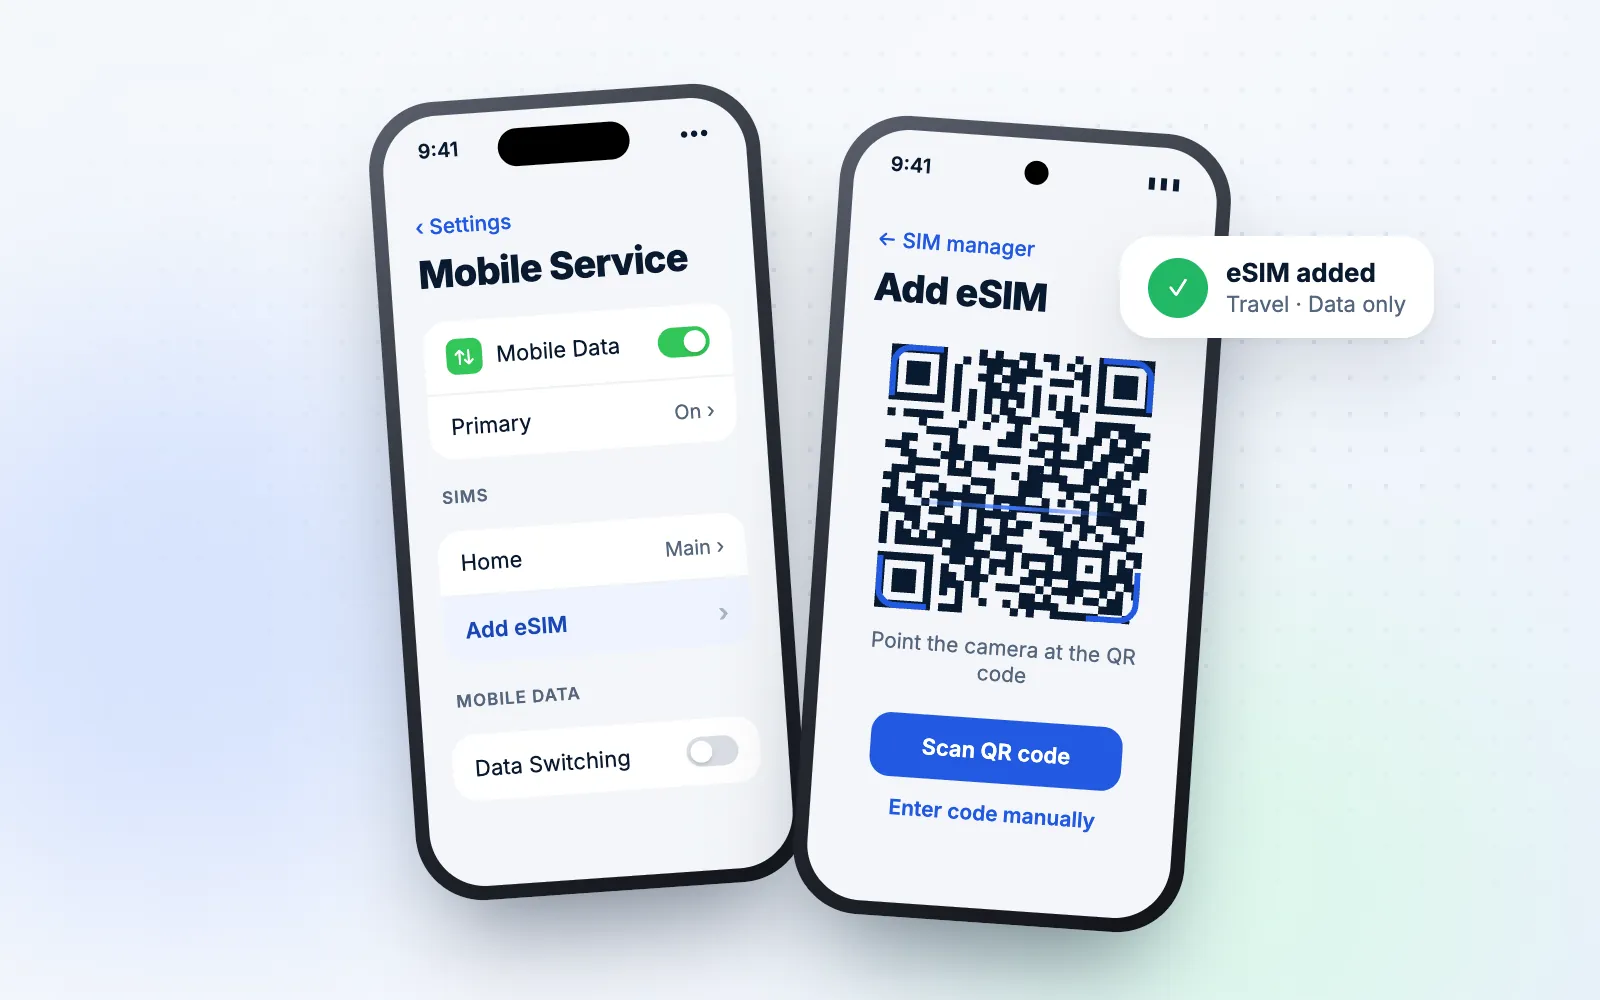
- Open Settings, then Mobile Service (or Cellular), and tap Add eSIM.
- Choose Use QR Code and scan the code, or tap Enter Details Manually and type in the SM-DP+ address and activation code.
- Follow the prompts until the plan is added. This usually takes a minute or two.
- Give the new line a clear label, such as "Travel", so you can tell it apart from your main line.
- When asked which line to use by default, keep your main line for calls, messages, iMessage and FaceTime, and choose the travel eSIM for mobile data if you're setting up for a trip.
On recent iOS versions, the Camera app can also recognize an eSIM QR code and offer to add the plan, which is handy if you can't find the menu.
How to Install an eSIM on Android
Android menus depend on the phone maker and the Android version, but the steps follow the same pattern.
| Phone | Where to add an eSIM |
|---|---|
| Samsung Galaxy | Settings → Connections → SIM manager → Add eSIM |
| Google Pixel | Settings → Network & internet → SIMs → Add SIM → Download a SIM instead |
| Other Android phones | Settings → Mobile network (or Connections) → SIMs or eSIM → Add |
- Connect to Wi-Fi.
- Open the SIM settings for your phone using the path above.
- Choose to scan a QR code, or look for an option to enter the code manually.
- Confirm the download and wait for the eSIM to be added.
- Rename the new SIM so it's easy to recognize.
- In the same SIM settings, choose which SIM handles calls, messages and mobile data.
Some Android phones let you pick a screenshot of the QR code from your photo gallery instead of scanning it with the camera. If your phone offers this, it solves the "only one screen" problem neatly.
After Installing: Settings That Matter When You Travel
Installing the eSIM is only half the job. These settings decide whether it works smoothly once you're abroad:
- Set the travel eSIM as your mobile data line. Otherwise, the phone may keep using your home SIM for data.
- Turn on data roaming for the travel eSIM. Many travel eSIMs connect through partner networks, so they need roaming enabled on that line. See how to turn on data roaming if you can't find the switch.
- Turn off data roaming for your home line. This stops your regular SIM from using data abroad and running up charges. Our guide on turning off data roaming shows where the setting is.
- Switch off automatic data switching. iPhones have an option called Allow Mobile Data Switching (or Cellular Data Switching), and some Android phones have something similar. Leaving it on can let the phone fall back to your home line when the travel signal is weak.
Don't delete the eSIM to "fix" a problem
Many eSIMs can only be installed once. If the line isn't working, restart the phone and check the settings above before removing anything, and contact the provider if it still won't connect.
When an eSIM Won't Install: Common Fixes
Most installation problems have a simple cause.
The code is invalid or already used. QR codes are usually single-use. If a previous attempt partly worked, the code may already be tied to your phone. Check whether a new line has appeared in your settings, and if not, ask the provider to issue a new code.
The phone says the SIM isn't supported. This usually means the phone is locked to its carrier, or the eSIM isn't compatible with your model. Your carrier can tell you whether the phone is locked.
The download stalls or fails. Check your Wi-Fi, restart the phone and try again. If scanning keeps failing, try entering the details manually.
The eSIM installed but there's no signal. If you haven't arrived in the plan's country yet, that's expected. Once you're there, check that the line is switched on, set as the data line and has data roaming enabled. Restarting the phone often helps it find the right network.
You can't add another eSIM. Phones can store a limited number of eSIMs. Removing an old travel eSIM you'll never use again usually frees up space, but double-check it's really finished first.
Removing an eSIM After Your Trip
When the plan has expired and you don't plan to top it up, you can remove it:
- iPhone: Settings → Mobile Service (or Cellular) → tap the plan → Delete eSIM.
- Android: open the SIM settings, tap the eSIM and choose Remove or Erase.
Before you delete it, check whether the provider lets you top up the same eSIM for a future trip. If it does, keeping the profile on your phone saves you installing a new one next time.
Frequently asked questions
Can I install an eSIM without Wi-Fi?
You need an internet connection to download it. Wi-Fi is the easiest option, but mobile data on your current line also works. If you're already abroad, that could mean roaming charges on your home line.
Can I scan an eSIM QR code from a screenshot?
Not with the same phone's camera. Use a second screen, enter the details manually, or check whether your phone lets you choose a QR code image from your photos, as some Android phones do.
How long does it take to install an eSIM?
Usually just a few minutes once you start, as long as you're on a stable connection. Waiting for the provider to send the QR code can take longer, so order ahead of your trip.
Can I install the same eSIM on two phones?
Usually not. An eSIM profile is normally released to one device, and many can only be installed once. If you change phones, ask the provider whether it can issue a new one.
Should I install my travel eSIM before I leave?
In most cases, yes. Installing at home on Wi-Fi is easiest. Check when the plan's validity starts, and leave the line switched off until you arrive if the provider recommends it.
Next step
Find an eSIM for your trip
Compare travel eSIM plans by destination, data and validity.
Find an eSIM for your tripData Roaming Editorial Team
We write practical, plain-English guides about using your phone abroad. Roaming prices and rules change, so we update guides regularly — always confirm current terms with your carrier. About our editorial approach


 USA
USA Japan
Japan France
 Europe
 Spain eSIM
 Italy eSIM
 Dubai eSIM
 UK eSIM
 Turkey eSIM